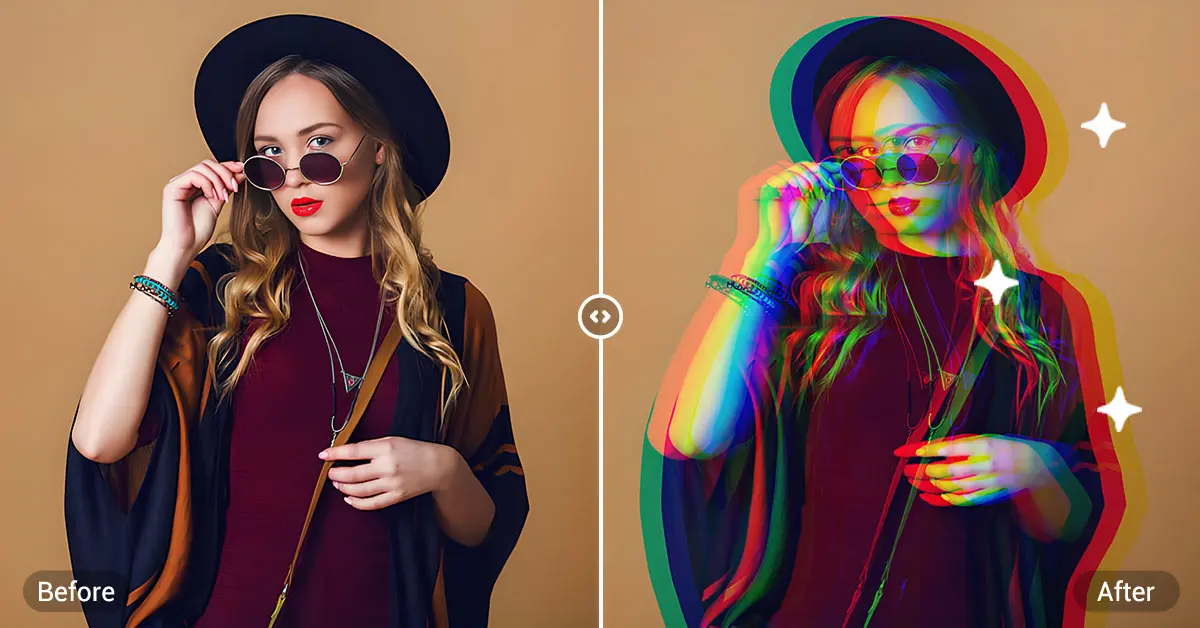
The glitch effect has become a popular way to transform ordinary photos into unique, edgy images. This digital distortion adds a malfunctioning or ‘broken’ appearance to photos, giving them a modern, creative, and artistic edge.
If you’re looking to create something eye-catching or simply experiment with digital art, learning how to add a glitch effect is a fun and easy way to elevate your photo editing skills.
In this guide, we’ll walk you through how to create the glitch effect using Photoshop, and we’ll also introduce some simple tools for adding a glitch effect quickly.
What is a Glitch Effect?
The glitch effect is a digital manipulation that distorts an image, making it look like it has malfunctioned. Originally, glitches referred to unexpected errors in digital devices, but in art, they are used for their chaotic and abstract qualities.
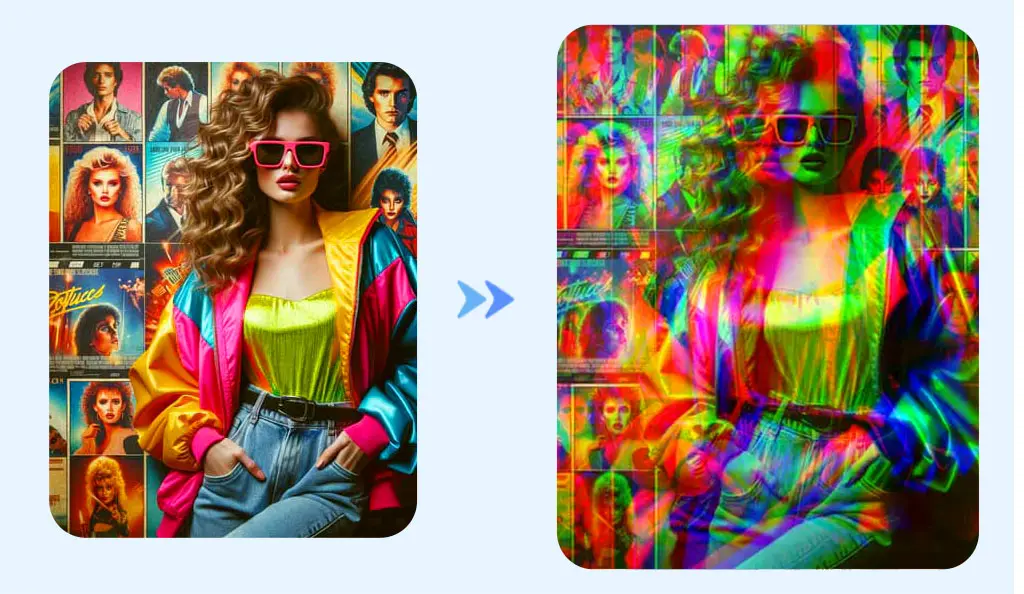
‘The glitch effect transforms ordinary images into digital chaos, giving them a modern and artistic flair. Applying the glitch effect can cause color shifts, pixel distortions, and noise, creating a fragmented look that adds creativity and uniqueness to a photo.’
There are several variations of the glitch effect, each offering a unique visual style:
- Color-shift Glitch Effect: This effect shifts the color channels (red, green, and blue), creating a fragmented, multi-colored look that gives the image a surreal and disjointed feel.
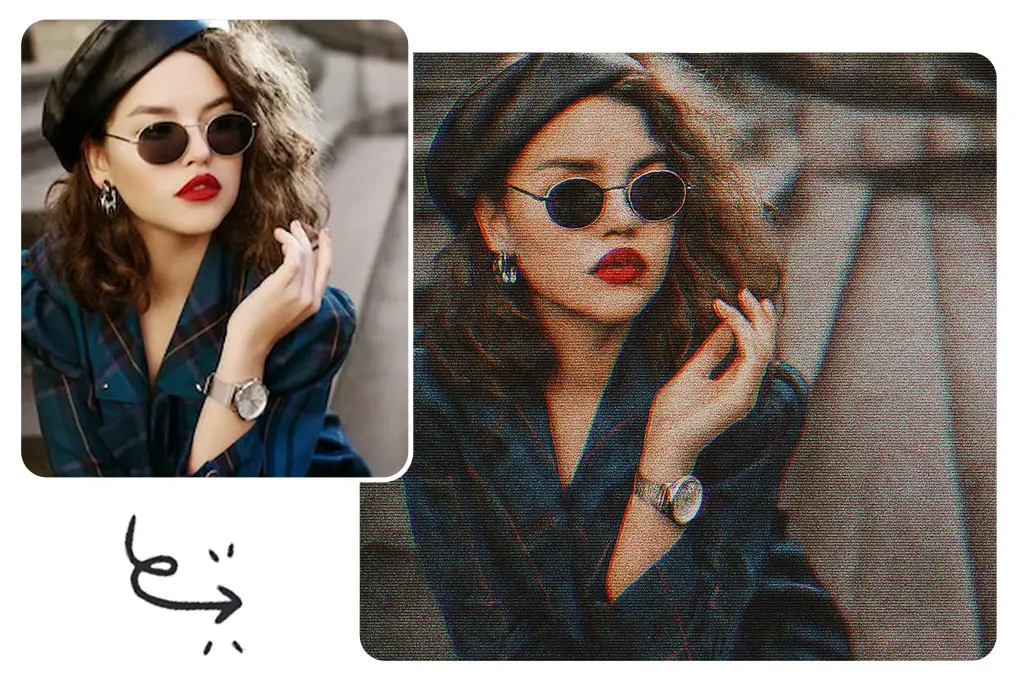
- Photo Grain Effect: Adding grain or noise to the image creates a rough, textured look that enhances the glitchy, broken appearance. This effect mimics the imperfections seen in older film photography or low-resolution digital images.
- Pixelated Glitch Effect: This involves breaking the image into pixelated blocks, distorting the photo into a grid-like structure. It’s often used to simulate digital corruption or distortion.
- Old TV Effect: Inspired by the visual distortion seen on old televisions, this effect mimics screen static, scanlines, and color bleeding to give the photo a retro, vintage look.

How to Make a Glitch Effect in Photoshop
If you’re looking to add a glitch effect in Photoshop, there are several tools you can use to manipulate your image and get that digital malfunction look. Follow this simple step-by-step guide to get started:
Step 1: Open Your Image
Start by opening the image you want to edit in Photoshop.
Step 2: Duplicate the Layer
To ensure you don’t overwrite your original image, duplicate the layer:
- Right-click on the Background layer in the Layers panel and select Duplicate Layer.
- Alternatively, press
Ctrl + J(Windows) orCmd + J(Mac).
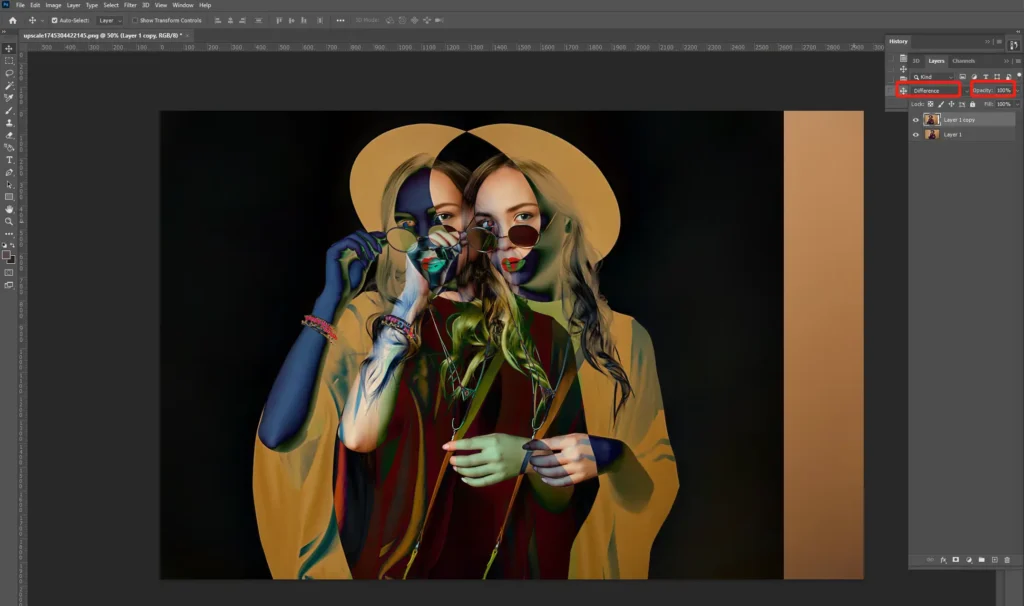
Step 3: Apply Blend Modes
Blend modes affect how layers interact with each other. To create a glitch effect:
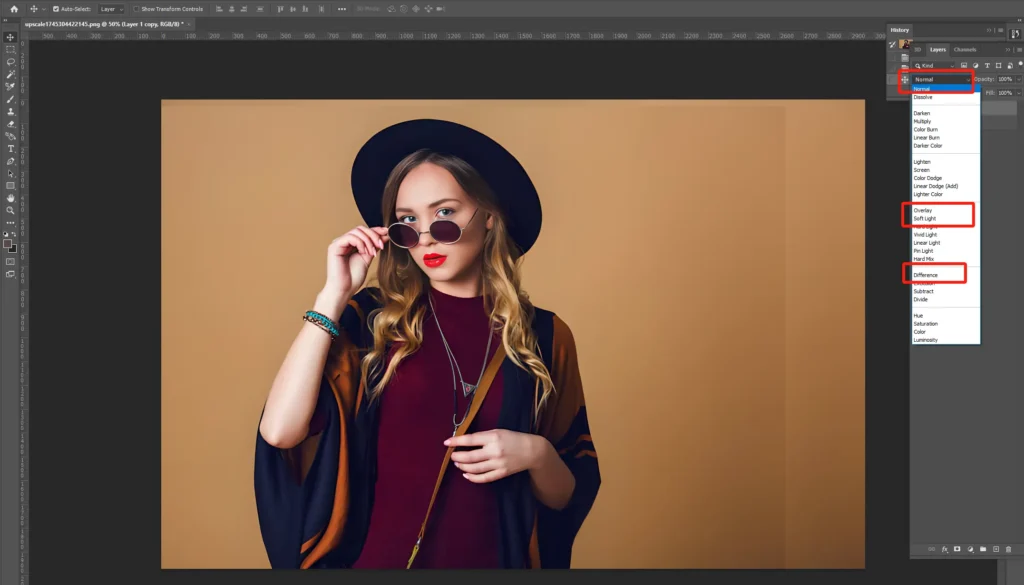
- Select the duplicated layer.
- At the top of the Layers panel, find the dropdown that says Normal (this is the default blend mode).
- Click on the dropdown and select Difference. This blend mode will instantly create color shifts and contrast, giving the photo a chaotic, glitchy feel.
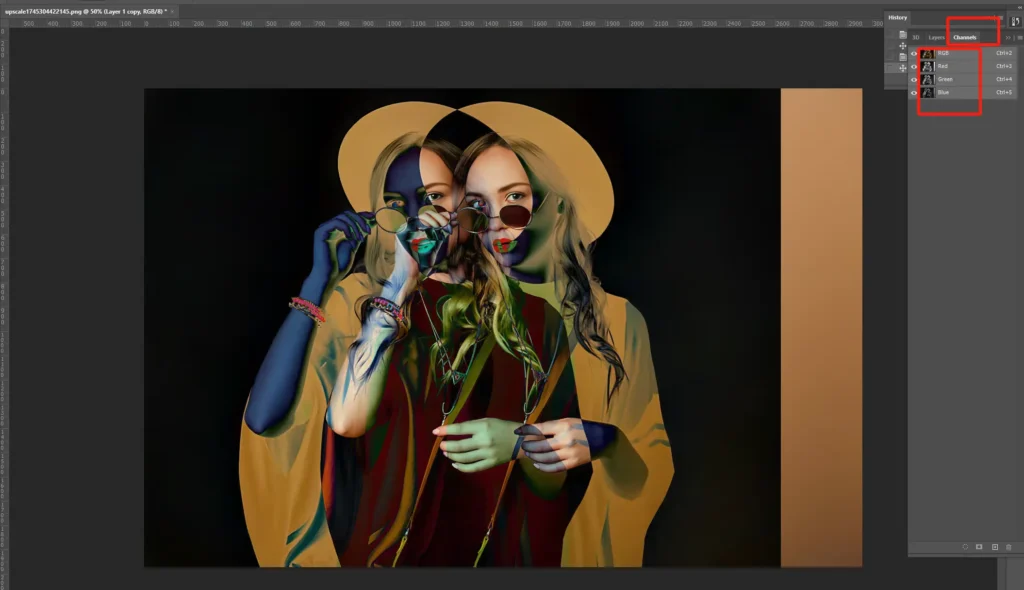
Step 4: Shift Color Channels
A key element in the glitch effect is manipulating the color channels:
- Go to the Channels panel (next to the Layers panel).
- You’ll see three channels: Red, Green, and Blue.
- Click on each channel individually and drag it slightly left or right to create color shifts. This will give your image a fragmented, distorted look.
Step 5: Add Noise or Pixelation
To intensify the glitch effect, add noise to the image:
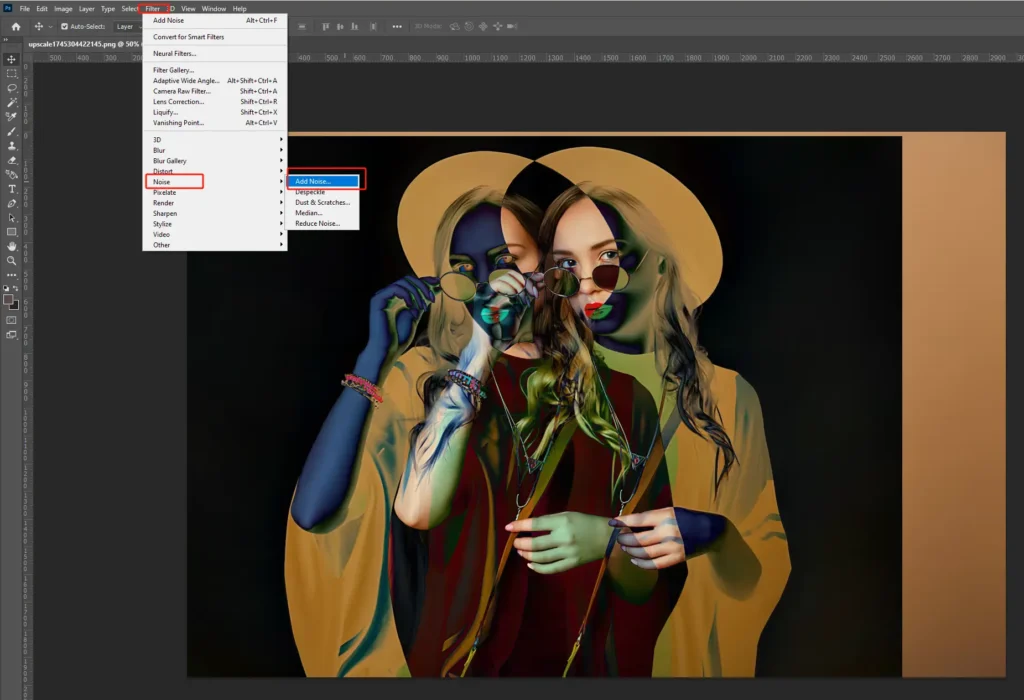
- Select the duplicated layer.
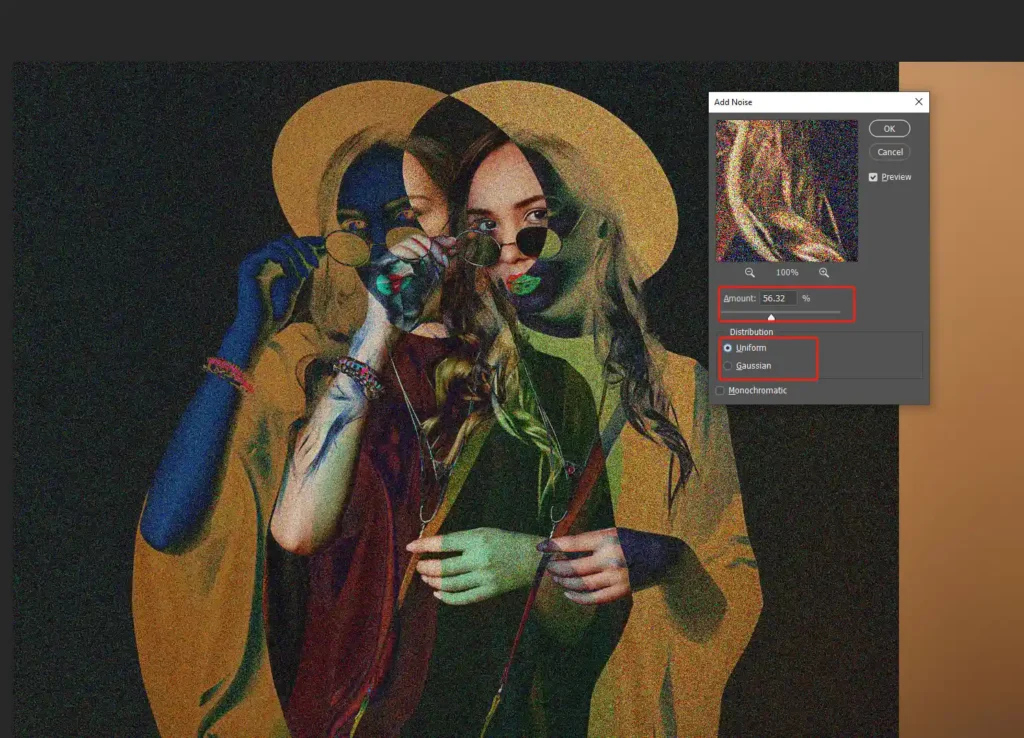
- Go to Filter > Noise > Add Noise.
- Adjust the Amount slider to control how much noise you want. You can choose between Uniform or Gaussian distribution, but Uniform tends to work better for glitchy distortions.
Step 6: Use the Move Tool
To create an even more dynamic glitch effect, use the Move Tool:
- Press
Vto select the Move Tool. - Use the arrow keys on your keyboard to nudge the layer left or right. This horizontal shift gives the image a ‘broken’ feel, which is a signature look of the glitch effect.
Step 7: Final Touches
Once you’re happy with the glitch effect, adjust the opacity of the duplicated layer or apply any other finishing touches like Gaussian Blur or more Noise. Experiment with additional blend modes for different results.
If you’re new to Photoshop, this step-by-step glitch effect tutorial from Photoshop Essentials is a great resource.
The Best Glitch Photo Editors: Try Picsman Glitch Filter
If you prefer a quicker and simpler way to add a glitch effect, several photo editors and apps offer ready-to-use glitch filters. One popular tool is Picsman Glitch Photo Editor, which allows you to apply a glitch effect with just a click. Here’s how you can use it:

Use Picsman to Create Glitch Images
- Visit Picsman Glitch Effect Editor.
- Click ‘Create Glitch Effect Now‘ and upload your image.
- Choose from five available glitch filters.
- Select the glitch filter that suits your style. You can also adjust the intensity to make the effect more subtle or dramatic.
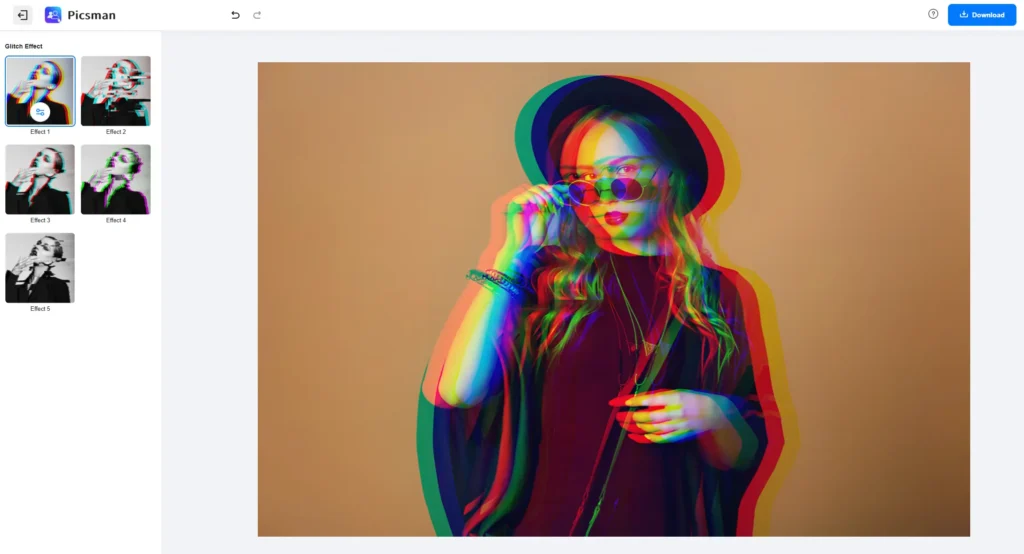
Picsman is an easy and fast way to apply a glitch photo effect, perfect for those who want quick results without complex editing tools.
Want to explore more amazing filters to make your image stand out? Try Picsman AI Filter for more fun!
Conclusion
Adding a glitch effect to your photos is a fun and creative way to create unique, eye-catching images. Whether you use Photoshop to manually manipulate the image or take advantage of a glitch photo editor like Picsman, you can experiment with different techniques to achieve the look you want. From shifting color channels and applying blend modes to adding noise and pixelation, there are endless ways to create stunning glitch art.
So, try it out, experiment with different tools, and discover how easy it is to transform your photos with a glitch effect. Whether you’re an experienced designer or a beginner, the glitch effect is a great way to add creativity and originality to your digital artwork.