Introduction
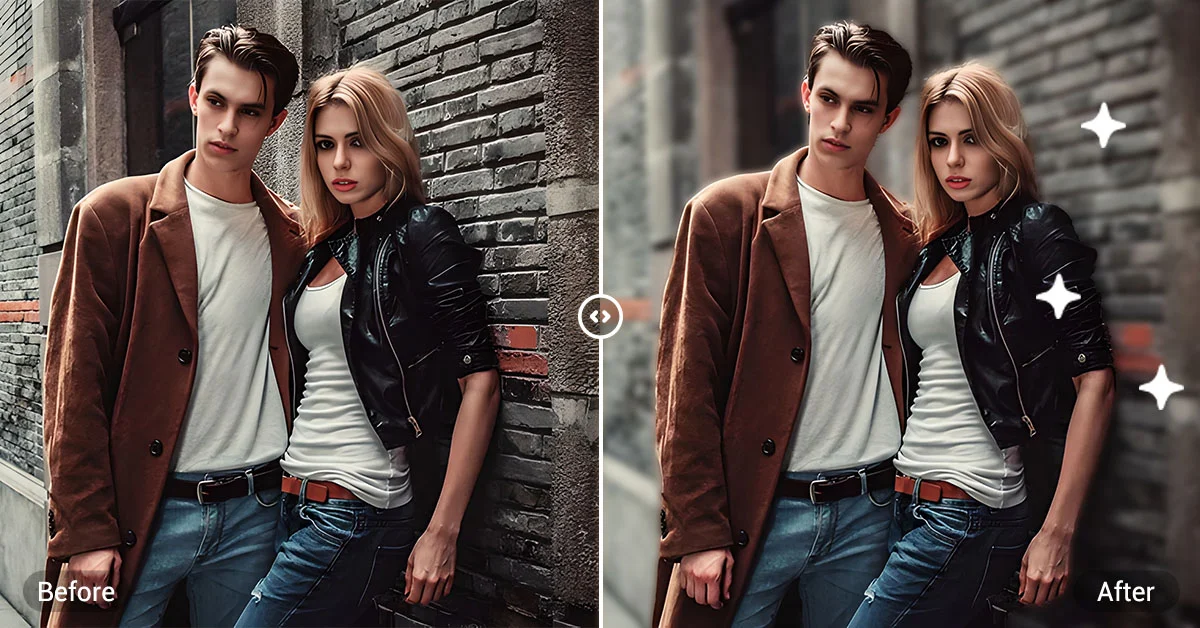
Background blur is a popular photographic technique used to highlight the subject of the photo while softening or removing distractions in the background.
With Photoshop, you can easily replicate this effect. However, if you’re looking for a quicker solution, Picsman’s AI-powered blur tool offers an automated way to achieve the same results.
In this guide, we’ll cover how to blur the background in Photoshop and how to use Picsman’s Background Blur tool for fast and easy edits.
How to Blur the Background in Photoshop: A Step-by-Step Guide
To blur the background in Photoshop, follow these simple steps:
1. Open Your Image in Photoshop
- Start by uploading the image you want to edit into Photoshop.
- For best results, use a high-resolution image to maintain clarity after applying the blur.
2. Duplicate the Image Layer:
- In the Layers panel, right-click on your image layer and select Duplicate Layer. This way, you’ll preserve the original image.
- Of course, you can also press the shortcut ‘Ctrl + J’ to duplicate the layer.
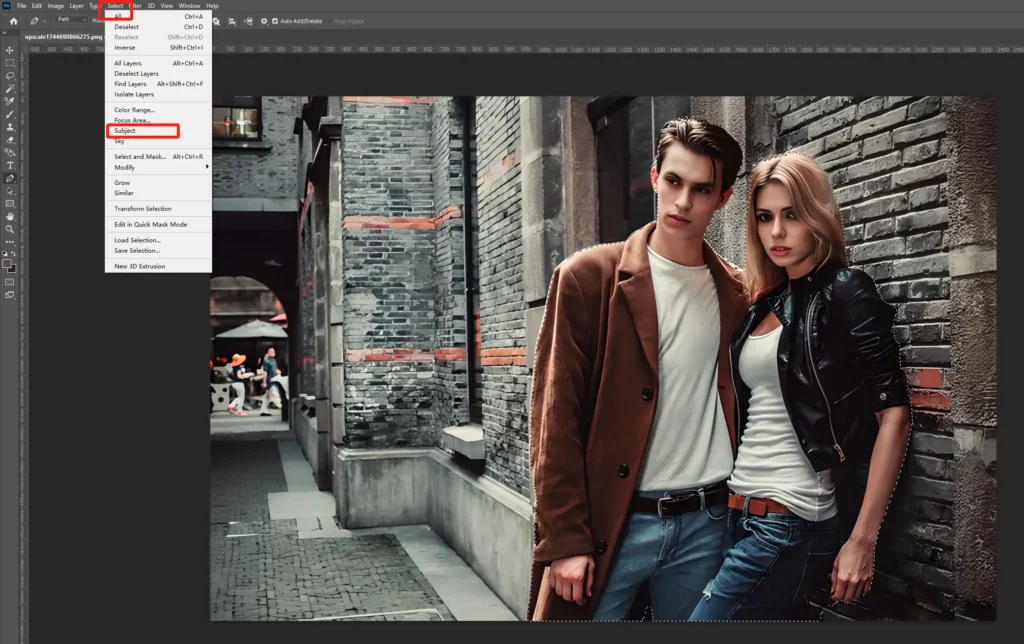
3. Select the Subject
- Use a selection tool (such as the Lasso Tool and Magic Wand Tool) to select the subject of the image.
- For a quicker way, you can also go to Select > Subject, and Photoshop will automatically detect and select your subject.
4. Invert the Background
- Invert selection by pressing the shortcut ‘Ctrl + Shift + I‘ (Windows) or ‘Command + Shift + I‘ (Mac) to select the background area.
- You can also go to Select > Inverse at the top of the menu.
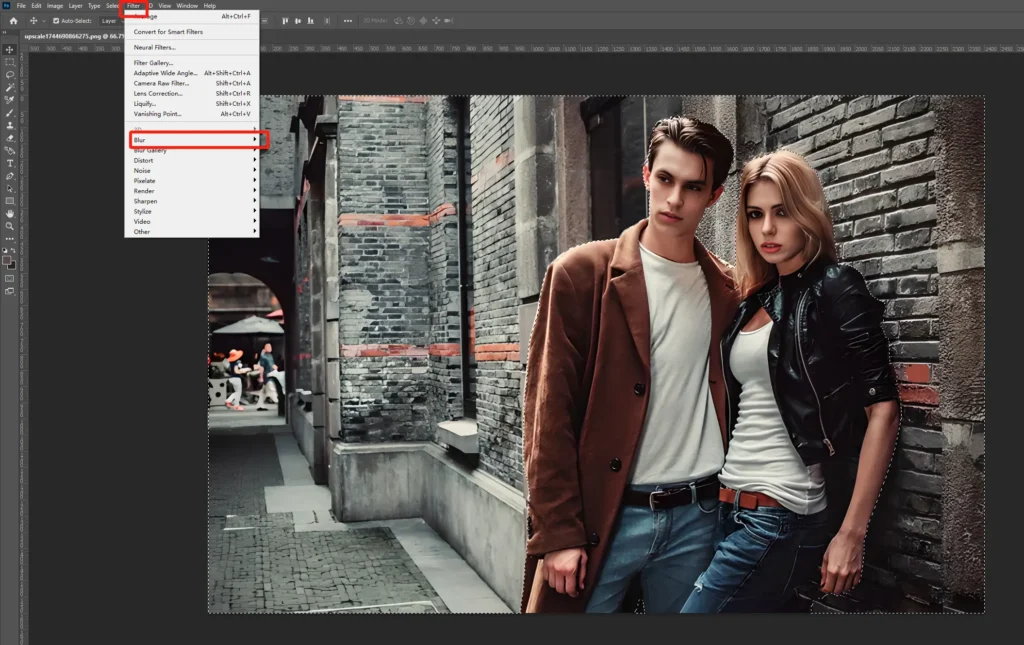
5. Apply the Blur Effect
Go to Filter> Blur and choose different blur types to blur your background, each with its unique effect.

- Gaussian Blur:
A smooth, soft blur that works great for portraits. Adjust the Radius parameter to control the blur amount. The larger the radius, the more intense the blur.
Mimics the blur seen with a camera lens, creating a more natural depth of field. Adjust the Blur Amount, Aperture, and Blur Area parameters to simulate a realistic lens blur effect.
- Motion Blur:
Adds a sense of movement to the background, ideal for dynamic images. Adjust the Angle and Distance parameters to create a directional blur effect.
- Box Blur:
A basic blur effect, useful for simpler images.
6. Fine-Tune for Perfection
- Use Layer Masks to keep the subject sharp and refine the blur effect to your liking. (For more information on Layer Mask, you can read this tutorial from Adobe Photoshop.)
- You can also use Photoshop’s Blur Gallery for more advanced control over the blur’s depth and direction.
Blurring the Background with AI: The Quick and Easy Method
Why Choose AI-Powered Blur?
If you want a fast and easy way to blur the image without spending much time on manual editing, Picsman’s AI-powered background blur tool is a great option. Here’s why:
- Automated Process: The AI detects the subject and automatically applies the blur to the background.
- Customizable Intensity: You can adjust the blur’s strength to suit your needs.
- Easy to Use: Simply upload your image and let the AI do the work for you.
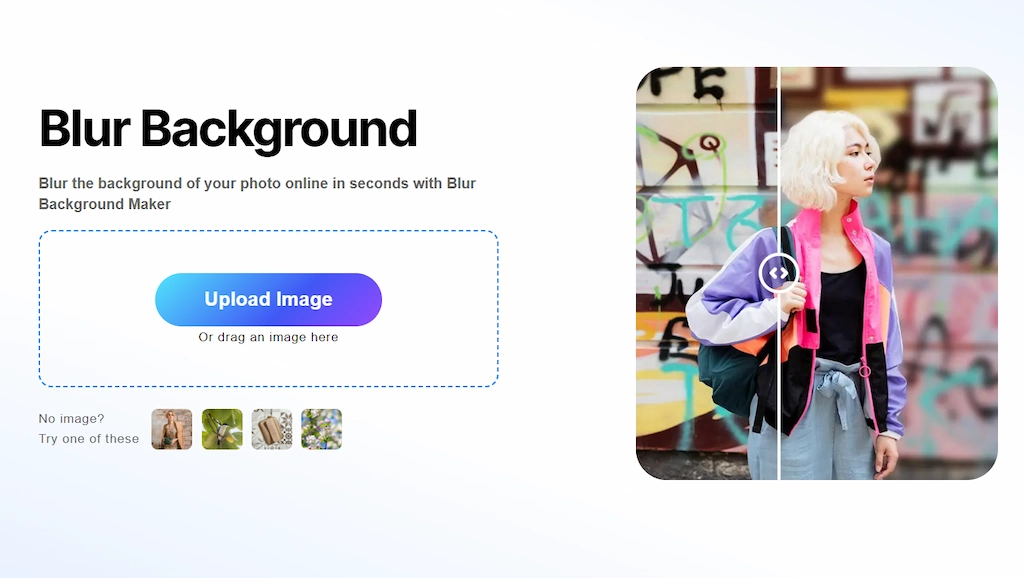
How to Use Picsman’s Background Blur Tool:
- Upload your photo to the Picsman website.
- The AI will automatically detect the subject and blur the background.
- Adjust the intensity of the blur to make sure the subject remains the focal point.
- Download the final image once you’re content with the result.

With Picsman, you don’t need advanced Photoshop skills, and you can achieve professional-looking results in just a few minutes.
FAQs
Q1: How do I blur the background of a picture?
To blur the background quickly, use Picsman’s AI tool, which automatically blurs the background with minimal effort. If you prefer Photoshop, use the Quick Selection Tool and Gaussian Blur for a fast and effective result.
Q2: Can I adjust the blur after applying it?
Yes! In Photoshop, you can adjust the blur’s radius to make it stronger or softer. If you’re using Picsman, you can also adjust the intensity of the blur after it’s applied to achieve the perfect look.
Q3: How can I refine the blur effect in Photoshop?
To refine the blur, use a Layer Mask to isolate the subject from the background, ensuring only the background is blurred. Photoshop’s Blur Gallery also offers advanced options to control the depth and direction of the blur.
Conclusion
Blurring the background in your photos is a powerful technique to emphasize the subject and add depth to your images. Photoshop offers detailed tools for creating the perfect background blur, while Picsman’s AI tool provides a quick and easy way to achieve a professional result without the need for extensive editing.
By following the steps outlined above, you can take your photo-editing skills to the next level. Whether you’re editing portraits or product photos, background blur will help make your subject stand out and create more impactful images.